
Hangboard Workout for Climbing, Getting Started
Thanks to guidance from my friend Kingsley, I’m working through a 2 month plan of hangboard/campus/systems training. Part of the reason I wanted to try his system was for its efficiency. There’s a very small window of climbable temps in Moab in the winter—you basically have to be in full sun if you want to do something outside, and you only get between 11 am and 2 pm when it’s cold (if it’s sunny). So you’re always rushing around trying to make everything happen in this little weather window, which means it’s hard to do much in a day. Doing hangboard workouts allows me to maximize my time by (hopefully) building a solid climbing base for spring during our cold season, and also have enough time for other things too, so it is great.
Kingsley outlined his method in the first hangboard post, and this here is all you need to know to get set up to try it. Most climbing gyms have a campus board and a systems wall, so if you live near a gym you’re set on those. It seems like it would be nice to have your own hangboard at home, even if you plan to use campus and systems equipment at a gym. The hangboard is the cheapest, most compact and easiest to set up of the three, also.
Here’s what you need:
Hangboard
12-15 foot piece of rope
2 pulleys
fifi hook
weight pin or ghetto-rig (loop of rope with a knotted bottom and carabiner on top)
weight plates: 2 25 lbs, 1 10 lb, 1 5 lb, 1 2.5 lb
notebook for training log (I have a week-by-week calendar book)
tabata timer (I’m using an iphone app)
stool or chair
2 liter platypus drinking system (stay hydrated! hanging this up nearby makes it super easy to drink the whole time)
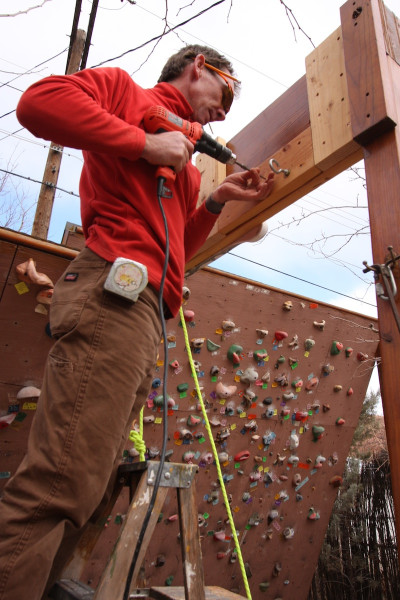
I originally had an old So Ill hangboard which was great, but I really like the big selection of pockets, crimps and pinch widths of the Metolius Contact board, so I switched (and they’re even on sale right now at Backcountry.com). What makes it tricky is that you need to be able to rig the pulley setup and have room for your weight plates also, so you do need more space than just a regular doorway. I could have put the board on the ceiling beam in my living room but didn’t really want it right in the middle of the house (I mean climbing is awesome, but there is a limit!). So the best place to put my board was on the main support beam of my backyard climbing wall.
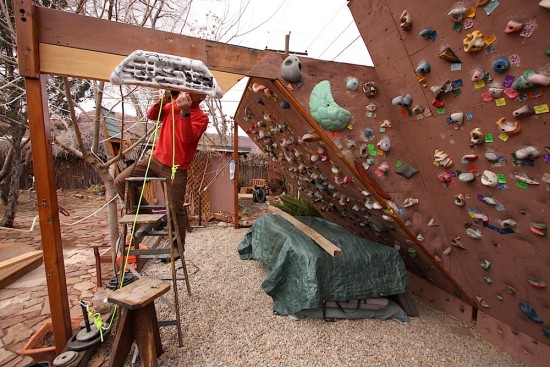
When the weather is nice, it’s GREAT to have the board outdoors. When it’s too cold, too hot, too rainy, too snowy, or too dark, it’s not so great—and this does create some scheduling issues for training. So if you have an available space inside to set up your board and pulleys, I really recommend going that route. Well, ideally, I’d have an inside one AND an outside one! I think Kingsley has his rigged up beside a basement staircase, which seems like the perfect spot. It should be pretty easy to build a free-standing frame for your board, though, if you have a place to do that.
After you get your board up, you’ll need to rig up your pulleys. I bought two small pulleys at the hardware store, neither one with a swivel, and also got a 15 foot piece of 7 mm static line. I also ordered a weight pin, on Kingsey’s recommendation (at first I just used a knotted piece of 5 mm static cord with a carabiner on top to clip to the pulley rope, but it was much less convenient to change the weight plates, though it did have the advantage of being free). I had a 7.5 pound weight plate and 4 2.5 pound plates already. I went to Walmart and bought 2 25 pound plates and a 10 pound plate, which cost about $50.
Mario ended up screwing in small pieces of wood with t-nuts behind the hangboard, and screwing in eye-pins to the t-nuts and hanging the pulleys off of those, but you could install your pulleys any number of ways. Set them so that one is under or behind the center of the hangboard, and the other one is off to the side—close enough to grab the weights and prop them on the stool after each set, but not close enough to be tapping them with your leg when you’re doing your hangs.
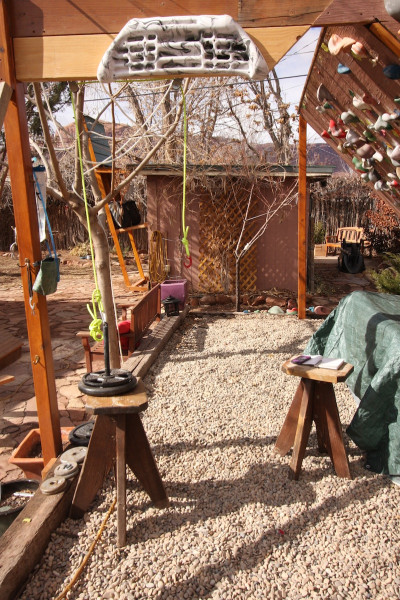
I put a fifi hook on my end of the pulley line, and it’s very easy to slip it in and out of the belay loop on my harness, letting me get out easily between sets to change weights and write in the training journal. The other end is just an overhand knot, and that’s what I clip the weight pin to.
I have a wooden stool to set the weights on, and I played with the length of the pulley line a bit so I can set the weights on top of the stool and then slip the fifi hook in and out of my belay loop without any extra slack in the system than that (so the plates stay off the ground when you release them from the stool).
Kingsley also told me to get a tabata timer, since this workout has very specifically timed sets. Basically, you do three sets of hangs on each grip, and the first one has 7 hangs, the next one has 6 hangs and the last one has 5 hangs, and it is all timed including the rest periods after each set.
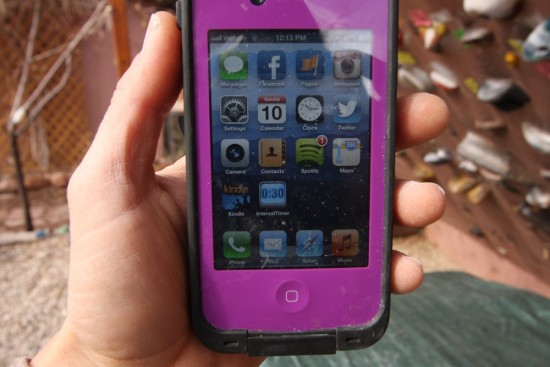
There’s a free iphone app called “Interval Timer.” I made 3 separate programs called Hangboard 7, Hangboard 6, Hangboard 5. Each one starts with a 3 second beep, then a 7 second beep, and so on until the end and then has a 2 minute “cooldown” beep. As soon as Hangboard 7 is over, I just select Hangboard 6, and then when that one is over, I select Hangboard 5, and then start back again at Hangboard 7 for the next set. You can also play Spotify on your phone while the Timer app is running 🙂 (If this is confusing, make sure you check back to the first post where Kingsley describes his workout, and it should all make sense. )
The 2 minute cooldown period between each set is great, because it gives you time to unweight the plates and slip out of the fifi hook so you can do things like take pictures of your dog and cat and change the weight plates.
I start each workout with some very easy warming up—usually climbing around on my wall for 15-30 minutes. Then I do 3 sets of 7 pullups, and 2-3 Frenchy double sets as the second round of warming up.
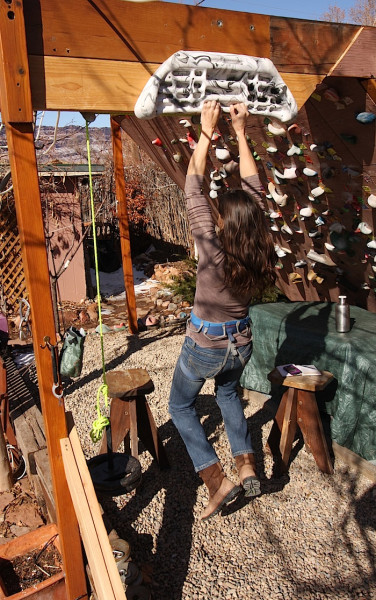
Then I follow Kingsley’s routine with all 6 grips: closed crimp, T3 (ring and pinky, which is heinously hard), T1 (index and middle finger, much easier), T2 (middle and ring), open crimp and pinch. I’ve found that closed crimp and T3 are my weakest (a surprise on the crimp, as I feel stronger on closed crimps than open ones when actually climbing, but no surprise at all on the ring finger/pinky combo!), so Kingsley recommended doing them first. T3 has not gotten much easier for me so far, and I think this is one to be REALLY careful with.
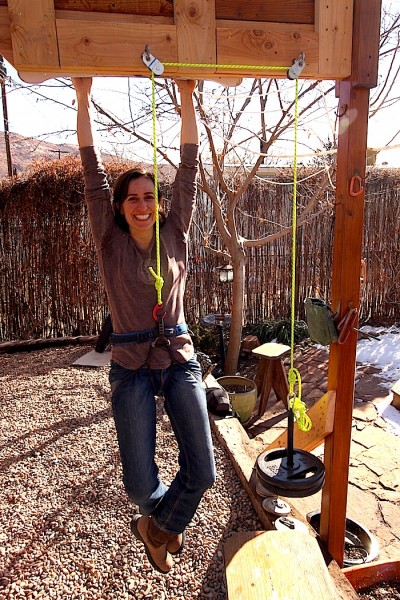
The open crimp and the pinch seem to feel the easiest, so I do those last and with the lowest amount of weight. Sequencing it like this also means that I start with most of the plates on my weight pin, and just keep removing plates as I go through the different groups.
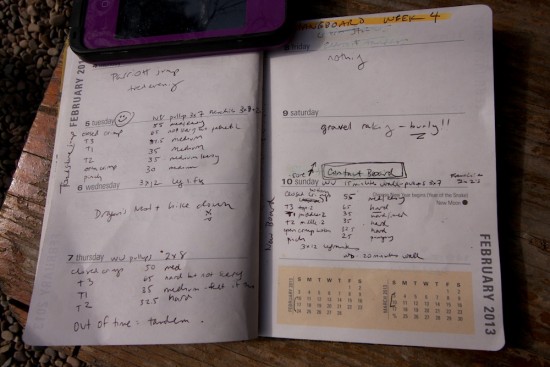
Kingsley also told me to keep a training journal. I have a calendar book with big spaces, and this is handy for a training log. I write down what weights I used for each set, and how it felt—this way I know whether I should remove weight or stay the same for the next workout. If I write “hard” by the grip, I keep the weight the same at the next workout. If I write “medium” or “medium/hard,” I reduce the weight slightly (2.5 pounds) for the next workout. T3 usually gets noted on a range from “scary” to “pathetic” to merely “HARD.” And since I’m doing all this, I write down other activity too. Again, this is something I’ve never done, but it’s definitely necessary to know what weights to use for the workout after 2 days have gone by since the last one.
I asked Kingsley if you can climb while doing this workout: he suggested doing easy mileage type climbing 2-3 days a week, but not going out and trying super hard. The first week or two, I was pretty cautious with the amount of weight I used for each grip. I think the most important thing when starting to do this type of training is to be very careful, especially with that T3 grip!
So for the first couple of weeks, I didn’t feel like I was doing much and was afraid I wasn’t doing enough, though Kingsley assured me that is normal and not to do too much too fast. But in the last week or two, I have been really surprised at how sore I get as I’ve started to get the amounts of weight in the right range for each grip. It’s almost time to start the campusing phase, just when I’m getting this hangboard stuff figured out….but I know I’ll continue to do these cycles in the future so I’m really glad to be learning about it.
Let me know if you decide to try this workout also, or if you have any questions for Kingsley about it, because I’m sure he’ll be happy to answer! He has been very generous answering all my endless questions…



You can also use a 5 gallon bucket filled with rocks/sand/water instead of weights. Just mark the weight of the rocks on the side of the bucket and dump out or fill (into another bucket) as needed. Should be about free if you can scavenge…
Hi Steph,
I love this blog btw. Definitely good to stress the note-taking…and to actually look back at them to see how much weight you were using last time. I got my first finger injury because I hopped on 2 finger 2nd team with my full body weight. lesson learned!
Such an interesting post, thanks so much.
Hi Steph-
Love these posts! Your blog is such a great resource.
Three q’s for you/Kingsley:
1) If I can’t set up a pulley system (climb at a gym but can’t put a hangboard in my small, rented apartment), is it ok to to “sag” so that only some of my weight is on my fingers? Or is there a better modification?
2) Would you be able to show me the difference between a closed and open crimp? Seems to vary on Google Images.
3) I know Kingsley had recommended transitioning to campusing after 4-5 weeks of hangboarding, but is it ok to do both programs at the same time?
Thanks so much!
Melissa
yes !!
thanks Tim! I hope you are recovered and can maybe try again with the cautious approach and your trusty notebook.
thank you to Kingsley!
Hi Melissa, I passed your questions over to Kings, and this is what he says:
Hey Melissa,
Any way to sweet talk the gym into setting up a pulley system for you? The downside with sagging is that it’s hard to judge the amount of pressure from one workout to the next, but if that’s all you can do, maybe try hangboarding while standing on a scale and holding it at a certain weight. I don’t know how well this would work but it seems more accurate than sagging.
I consider a full crimp when my first two knuckles are above my fingernails with my thumb fully over the index finger and halfway over the middle finger. I hear a lot of people say not to train this grip but I guess the argument would be you use this grip outside all the time so why not train it? I started training it because I was doing less weight with 3t than full crimp.
There’s only a few times when I do both at the same time. One is when I know I won’t be able to train for 3-4 days so I’ll overtrain and use that time to recover. The second is when I need to accelerate my program. I’ll start campusing during my 4th week of hangboarding. I absolutely wouldn’t recommend campusing during your whole hangboard phase. I really don’t have any scientific data on why you shouldn’t, I just feel that you’d be breaking your muscles down to the point where you’d need too much time to recover.
Hope this helps.
Kingsley
Thanks so much for answering my questions, Kingsley/Steph! Very helpful, and good idea on the scale—that might be the most likely option for tracking weight.
good luck!
This is so cool! I have been looking for a way to do a lower impact hangboard workout. Thanks for posting this.
Sorry I will be missing you all at the crack clinic next month. Hope to get a chance to pass through Moab at some point this year!
Hope you like the workout…I’m loving it so far!
[…] you got motivated to start Kingsley’s hangboard workout and were able to get your whole setup organized and put together. Since I’m following his training advice, I had to stop the hangboard workouts a few weeks […]
Hey Steph!
Quick question for ya. How far apart are the eye pins that hold the pulleys?
I’m looking to build a freestanding hangboard this weekend and am working out all the dimensions right now. Just trying to figure out if this thing’s going to be wide enough to hand the pulley’s side-by-side, per-say, or if I need to angle them a bit.
[…] Rae, I used to lift weights in the winter, but I switched to more finger-specfic training with a hangboard, campus board and systems. For me, finger strength seems to be the biggest weak link, so targeting […]
Hey Steph! Wondering if you’ve seen the bam hangboard, and what you think of it? -> http://www.bamclimbing.com
I will have to check it out
[…] on it. I’d recommend starting to do some pullups and Frenchies, and very gradually doing weight-assisted hangboard exercises (if this is easy for you to organize) 2-3 times per […]
[…] out Eric Horst’s training book, and my posts about fingerboard training. What I like about Kingsley’s method (outlined in those posts) is that it allows you to remove weight from your fingers through the use of the weight/pulley […]
[…] to finish the whole thing, but I find that whatever I do helps a lot. Here are posts about the hangboard and campus workouts. I used to lift weights in the winter, but I have found that doing more finger […]
I’m super late to this party, but this is extremely useful info here as I’m in a very similar position (except I do have a gym nearby, but I also have a home campus board as well so I’m doing a mix). Thanks for this!