Weatherproofing Your Outdoor Climbing Wall
Hi Steph, I read your backyard wall post and also saw that you got an additional grasshopper master wall. I was curious how you weatherproofed the wiring for the LED and t nuts for this set up (and I suppose the wall itself?) for your outdoor walls? Thanks! Fanny
Hi Fanny,
Thanks for your question: a lot of people have been asking me about what I’ve done to manage weather for my outdoor walls, so it’s definitely time to share some of these ideas!
First, keep in mind that outdoor construction does pretty well in Moab due to the dry environment, and I can climb on my walls year round if I manage sun/shade on them. We do get rain, but overall it is significantly less moisture than many other places. Sun and UV damage is also a big issue for outdoor wood, though.
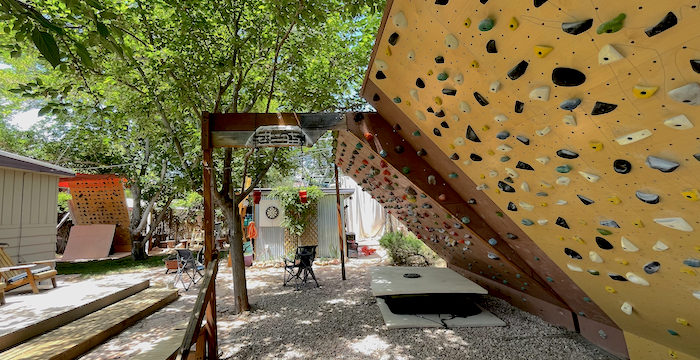
In my yard right now, I have a Grasshopper adjustable Master Wall, a 10 foot Kore6 Treadwall, and a fixed angle 40 degree Moonboard on my traverse wall.
The Treadwall offers a weather-protection option for outdoor specific walls–it costs more, but when you choose this option, all of the hardware is rust-proof. So technically it should be ok to let it stay out in the elements, even if it gets rained on. I did add that option to mine, but my Treadwall faces east, so the front gets hit by morning sun, and the back gets hit by afternoon sun, and I knew the wood slats would get UV damaged before too long, based on my experience with wood around my yard, and I also didn’t like the idea of letting rain pour down the back side, which is slabby.
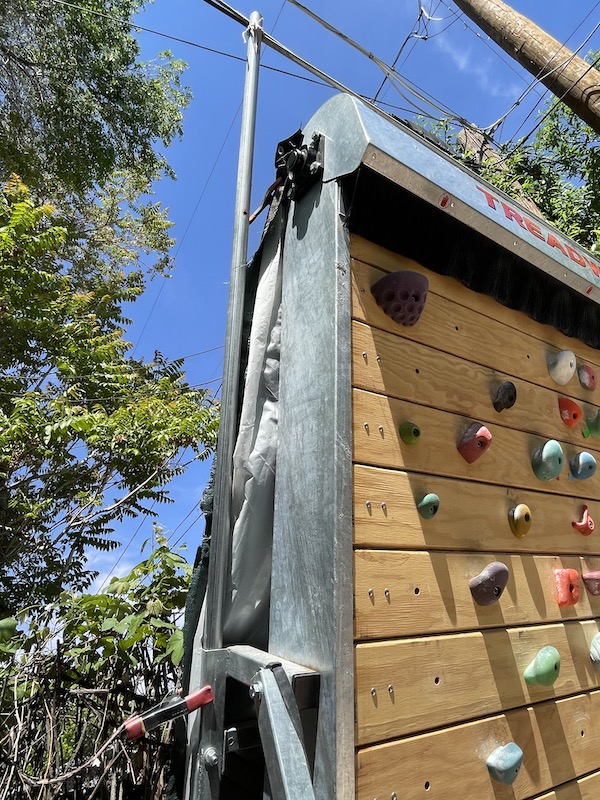
So I covered the back with heavy plastic (I bought a heavy plastic painter’s dropcloth from the hardware store), and then added a layer of brown plastic tarp over the top of the plastic. The plastic/tarp was very easy to secure, because I was able to just clip spring clamps on the top metal hood piece and also down the metal side framing of the Treadwall to hold it in place.
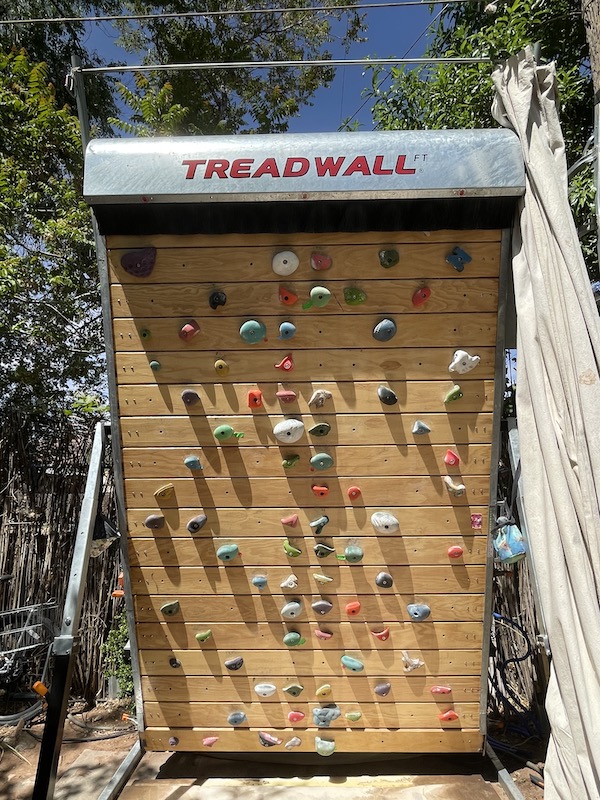
Keeping sun off the front was another project, but again the construction of the Treadwall ended up making it really easy to work with. I used metal pipe that I happened to have lying around, and was able to screw a thin pipe between two thicker pieces to create basically a shower rod–and the ends of the thicker pieces slotted perfectly into an open square rod of the Treadwall that’s part of the support frame on each side.
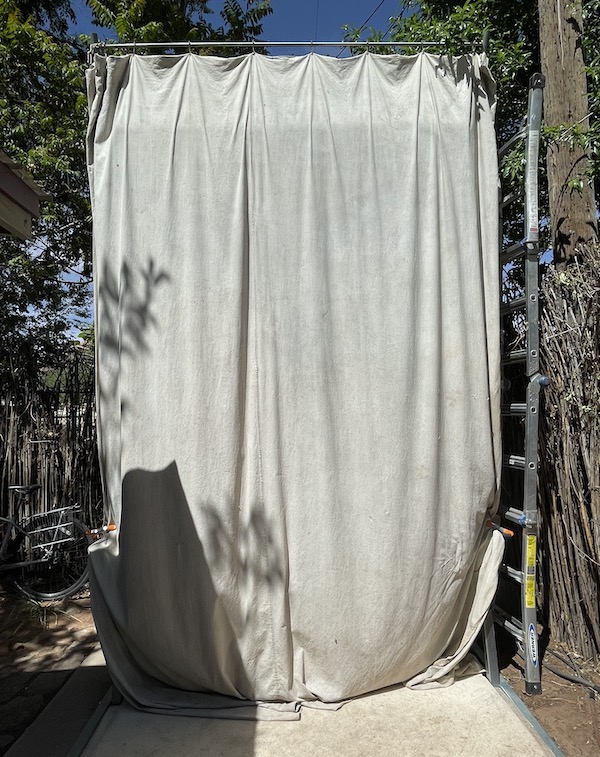
I had a large canvas painter’s cloth that I used to use at the traverse wall for covering up crash pads to keep sun off them, so I repurposed it and put grommets across the top, then added shower curtain rings and rigged up a very large canvas drape. It’s easy to pull to the side when I want to climb, and I’ve discovered I can also clip it off to things with spring clamps and use it for additional shade, so it has worked out really well!
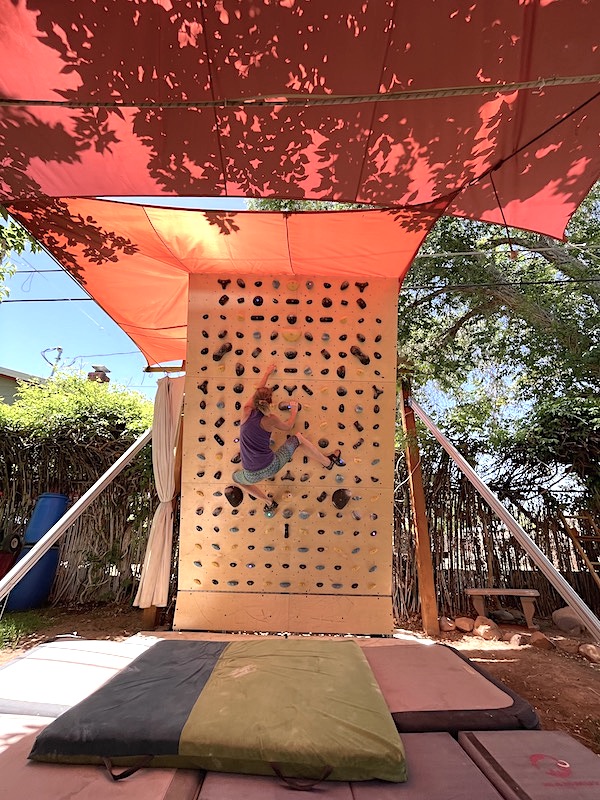
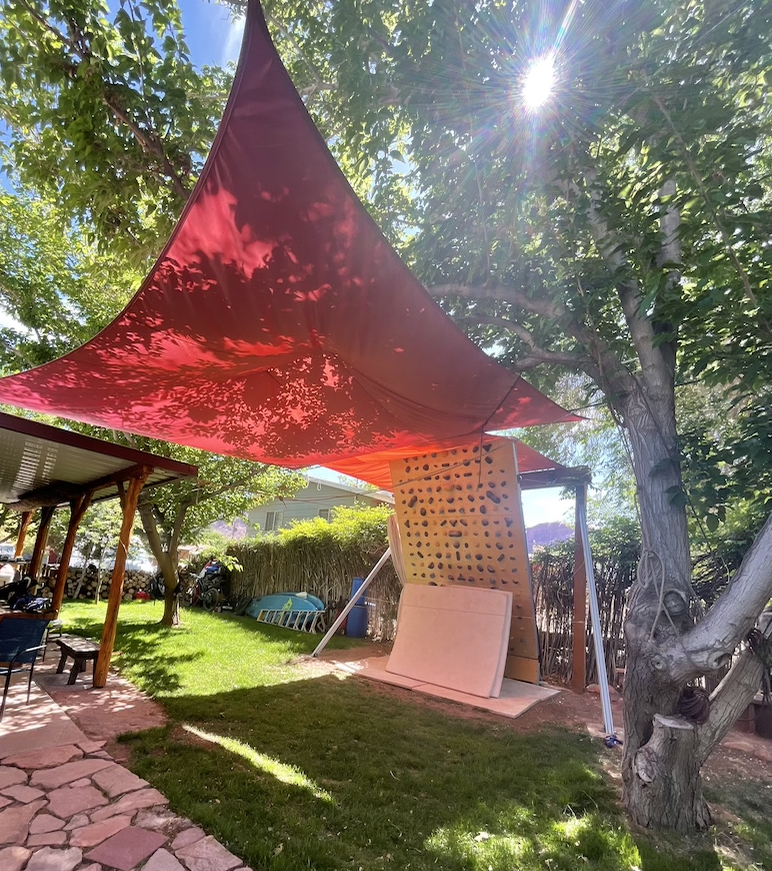
In the summer, I always put up a shade sail too, as well as a small string of misters, and it’s actually cold sometimes when I’m climbing on the Treadwall even in mid-July–this is one huge advantage of the Treadwall, because your body stays in one specific place while climbing and you can be directly in the misters. And, the wood is holding up great.
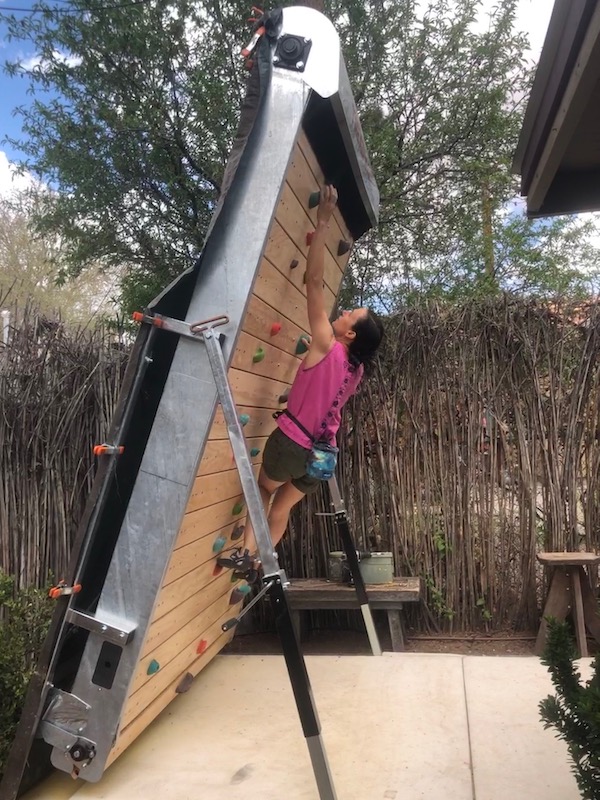
The Grasshopper Master Wall is framed with aluminum, and they use panels made of incredibly durable and weatherproof wood composite, which eliminates most problems of longevity in an outdoor setting. However, the Master Wall does have LED lights on back, so it is really important not to let those get hit by the elements, partly for longevity and also because if sun is shining on the back of the wall it’s actually hard to see the lights on the front of the wall. I used the same concept, and the same plastic and tarp material, to protect the back of the Master Wall.
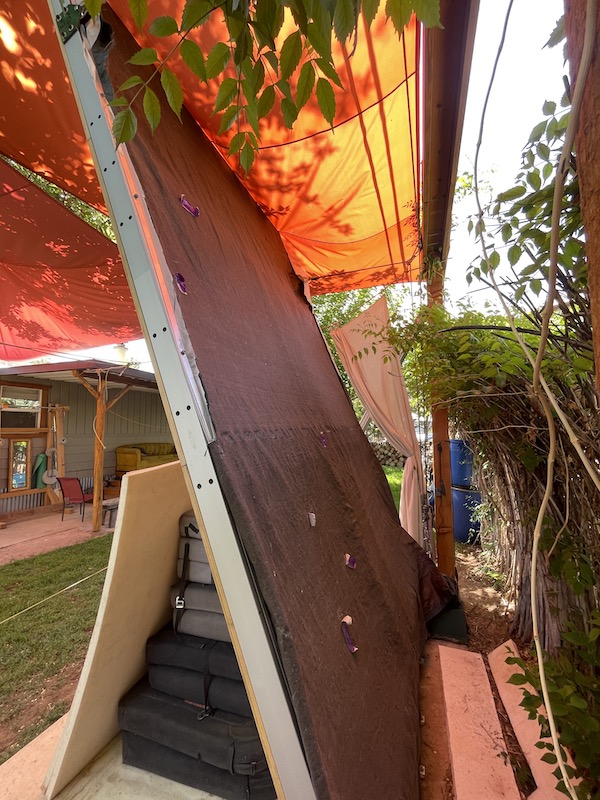
Note that I actually used an old brown tarp that was pretty beat up already instead of buying a new one, so it looks a bit ratty…. I have a lot of plastic tarps and couldn’t justify buying a new one even though this brown one had some small holes in it, so I just put some duct tape on the holes. The tarp is really there just to protect the heavy plastic sheet, and also add darkness to the back of the wall. (Since the backs of both the Grasshopper Wall and the Treadwall face my neighbors’ yards, I used brown tarp instead of blue because I wanted it to blend into the trees and vines and not be visually obnoxious for them.)
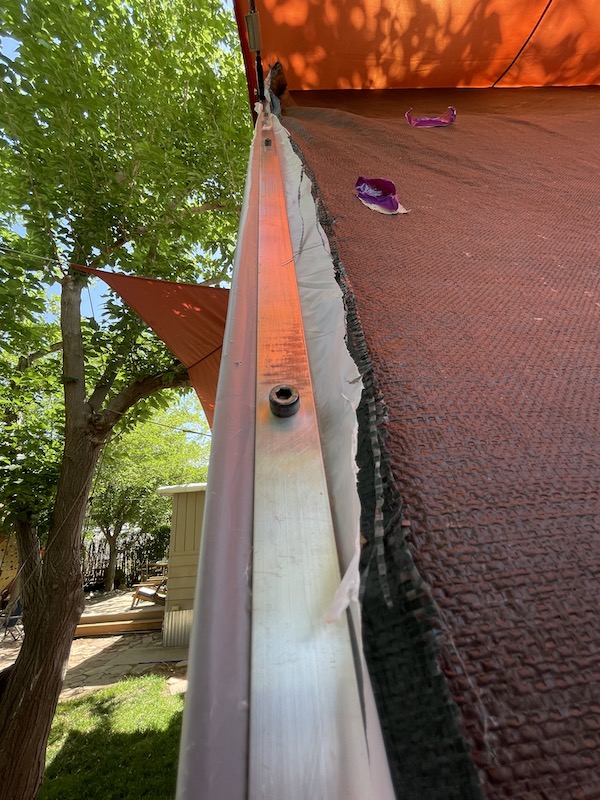
The Master Wall also has some construction elements that made it really perfect for this rig–there are threaded holes up the backsides of the aluminum rails, so I bought some aluminum strips at the hardware store, drilled holes in them, and then screwed them over the sides of the plastic/tarp layers to hold them in place across the top of the wall and down the sides, over the back.
I was a little bit heartbroken on this one, because I have a piece of EPDM roofing vinyl called roofwrap which I’d been saving for just such an occasion and it was going to be super deluxe, but it turned out to be 6 inches too narrow to use–it was a huge letdown! Rats! Nonetheless, the plastic/tarp layering is doing just fine on both the Grasshopper and the Treadwall backs. But, if you can get your hands on some roofwrap, it would be the absolute best cover material for the back of your Master Wall because it’s relatively light, easy to work with, black on the inside and white on the outside, and it lasts forever.
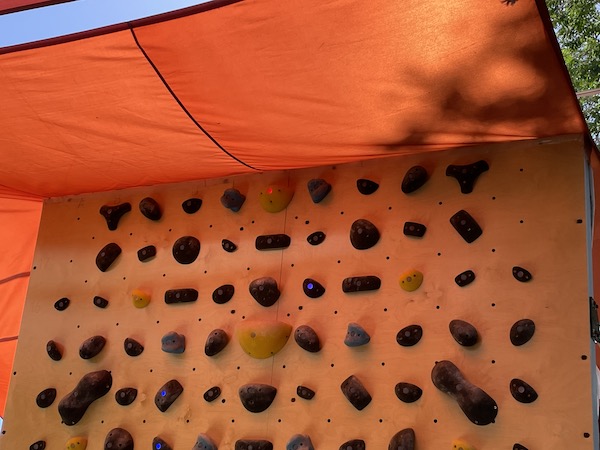
I have noticed that some of the bolt heads on my Master Wall are showing signs of rust, which worries me a little. I added a piece of clear Gorilla tape along the top front edge of the wall to protect the bolts that are holding the tops of the panels in place (because sometimes rain comes down the top edge), and the tape is doing great to keep those dry. I also put shade wings over the top and back of the wall, as well as over the front climbing zone, in the hot season and this also helps keep rain off the back of the wall. I’ve been putting WD40 on the bolt heads that look a little rusty, but it would have been better (though much more expensive) to spring for stainless bolts for all of the hardware, and I may ultimately replace all of the bolts with stainless. For the winch, which is sealed, I simply knot a trashbag over it when it looks like rain, and though that’s kind of a not-so-stylish fix and probably really not even necessary because rain really can’t get inside anyway, it makes me feel better.
The only downside to the tarp/plastic covers is that my cats sometimes decide to summit the walls–I do not like this!!! However, it’s awesome to see them send, and it seems like the tarp layer is serving as hero ice and saving the plastic layer from their shreddy little crampons. So, the system does appear to be working even against tough cat conditions.
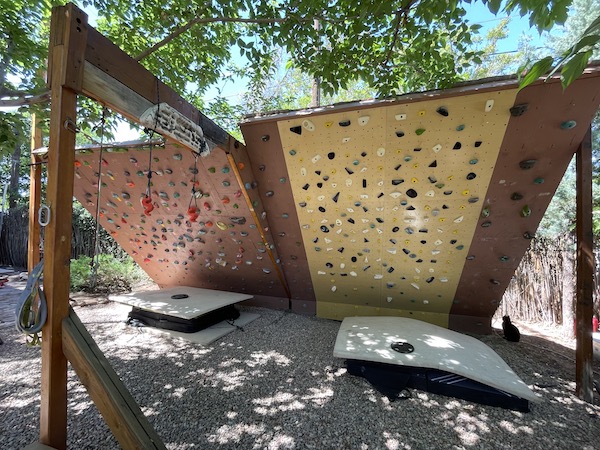
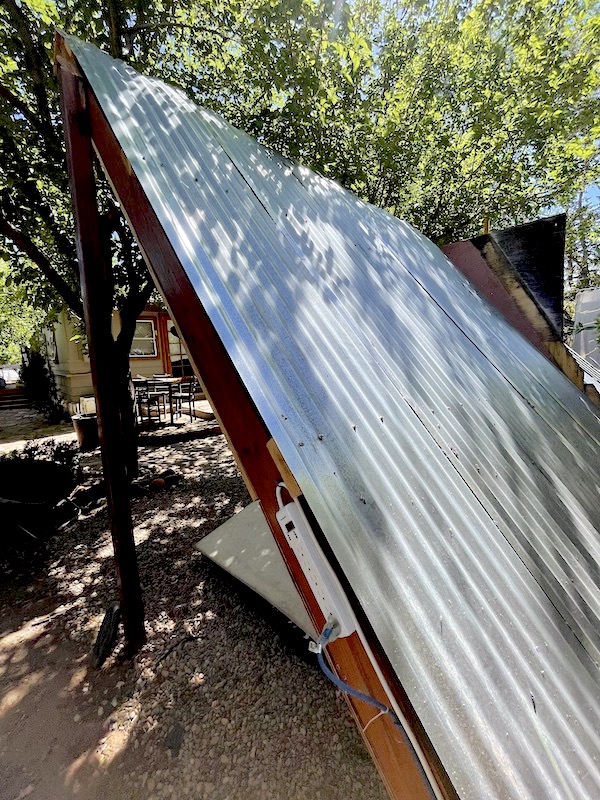
The moonboard is on my original traverse wall, and the back of that wall has been covered with corrugated metal for the last 20 years, because weight is not an issue and it’s framed with wood, so it was easy to screw into. I did have to unscrew it all when we put the moonboard panels up because we changed the angle of that side of the wall from 30 to 40 degrees, and I also needed to climb up and down the back to put the LED lights in. I re-screwed it all back on after that, and we saw from the great condition of the 20 year old framing that corrugated metal is completely weather and sun proof and really can’t be beat in this situation.
I learned the hard way a couple of years ago that the nice round piece of wood trim I had added to the very top of this traverse wall for a finishing jug rail was collecting snow and rain and leaves, and damaging the support wood I’d screwed it to (and even the tops of the plywood panels under the beams), so we had to replace those upper beams with painted 2×6, and I no longer try to put any holds over the tops of upper beams–all the holds end on the plywood, as with most walls. With this wall, the Moonboard panels are actually Grasshopper panels and as I mentioned before, they don’t need any weather proofing. The pink sections are regular plywood, and I’ve found that regular exterior house paint is the ultimate UV protection for wood. (For any wood that I don’t want to paint, I treat with Sikkens Cetol deck treatment, because Sikkens is the only thing I’ve found that can keep wood from dry-rotting in Moab sun. It still doesn’t block ALL UV rays like straight-up house paint does, and it does require several coats over time to be truly effective, but it does remarkably well and it’s the only product I’ve found that allows me to have unpainted wood outside in Moab that lasts.) These wall panels have been up for over 20 years, and have 2 coats of paint on them, so they have done really well.
I hope this gives you some ideas for weatherproofing your outdoor wall, both for longevity and best climbing conditions!