Hauling 101
Hi Steph,
I hope I am not bugging you with a stupid question but my buddies and I have been training for the Salathe Wall and we cannot find any good info on how to set up a haul system I was wondering if you maybe had a basic picture that you could send of someone hauling at the anchor all I can find is hand written instructions with no pictures I really like to see what’s going on if you can help that would be awesome if not thanks no worries sorry if I bugged.
P.S. your solo of the Diamond was so awesome!!!!!!!!!!!!!!
Thanks
Dave
Thanks Dave!
Fish Gear has been the best resource for all things big wall since before I started climbing. I think the description on their site is one of the best, most straightforward descriptions of basic hauling technique.
Also, I have to recommend that you buy Chongo’s book on hauling and big walling.
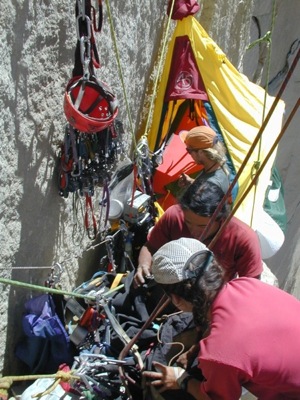
Hauling and big walling in general always seems like a giant cluster until you just go actually do it. Then it turns out to be pretty straightforward.
The most important thing I would add to the Fish description is this: BACK UP YOUR PULLEY. Most hauling how-to’s will include a drawing of that, because it is SUPER IMPORTANT. Once you have your pulley rigged (I prefer a Petzl pro-traction for big loads, mini-traxion for light), make sure you take the spare twenty seconds to run a sling through the anchor point with a locking biner on the end, and attach the locking biner to the rope beside the pulley. I really can’t emphasize this enough. So I’ll just say it again. BACK UP YOUR PULLEY! !! 🙂
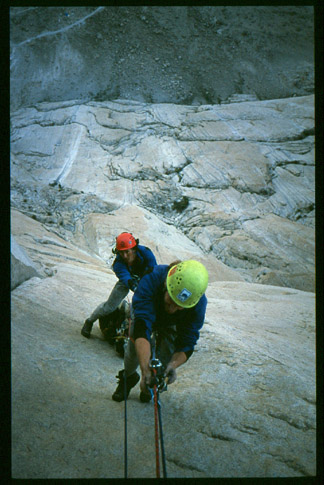
The other thing that can get lost in the shuffle, believe it or not, is to make sure that you are tied into a leash of rope or something independent as a safety line if you are the person who is doing the body hauling (counterweighting the bag with your body, so you go down about 10-20 feet from the anchor and then jug back up the haul line). I have seen this forgotten several times over the years, because there’s always a bit of a cluster going on when the team is getting in gear, usually on day one, or even later when people are tired/distracted. So I can’t emphasize this enough either.
This is somewhat addressed on the Fish site, where they offer a “safer technique” with the haul line loop. Just make yourself a long leash with the end of whatever rope is most available, and it’s a non-issue, and you are completely safe. If you are jugging on the haul line, and the pulley breaks (the point holding both you and the haulbags!), you will theoretically be glad you were tied in to a separate rope for safety, though it will be terrifying as you fall to the end of your back-up leash, and you may still be ripped off the wall by the impact weight of the haulbags on you, if your jugs don’t twist off the haul rope and free you from the haul line….so once again, this is why you really want to BACK UP THE PULLEY! (And in reality, if you have BACKED UP YOUR PULLEY, you are generally going to be okay even if you go without the back-up leash. Though you didn’t hear that from me. 😉 )
I think this diagram from the spadout website is pretty good:
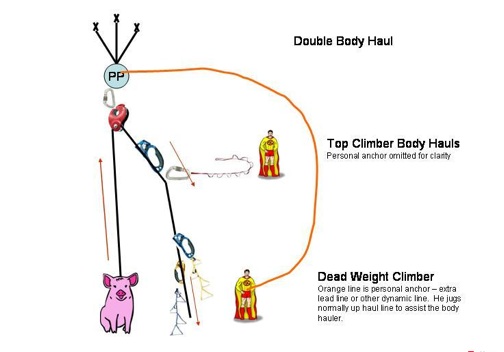
They clearly indicate the backup lines on this drawing, referred to as “personal anchor.” Although they do not diagram BACKING UP THE PULLEY. Which, as I may have mentioned, is the most important thing. But, they get full points for the adorable pig/haulbag avatar.
One other thing I have found to be extremely helpful with hauling is to have a 40 foot piece of static line (7 mm is a good diameter) permanently attached to the haulbag on the route, as a haulbag leash. You can clip it into the main locker on the haul bag loops. This will make your life a million percent easier on the entire route. Instead of clipping the bag directly into the anchors, you tie a Munter hitch with the haulbag leash, and then back it up. When it is time to release the bag, you just undo the back up, and lower the bag out with the Munter hitch. If the bag has to be lowered out a lot, because it’s a traversing or overhanging pitch, it’s already rigged on a 40 foot lower-out line.
Also, though swivels are really expensive and it’s hard to buy one if you think you’re just doing one wall, it is totally worth having a swivel. And don’t forget to cut off a plastic bottle top to cover the knot of the haulbag.
I have done major hauling a few times in the past, the worst of it in Baffin Island when we were doing a 21 day big wall route. We had three haulbags, and we would actually fix a few pitches and then devote a whole day to hauling and moving the ledge camp. Doing a route with massive hauls has its charm. Mostly in the form of memories after the fact… 😉
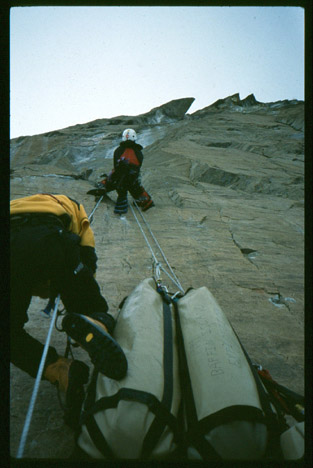
Usually if you are a team of 3, you have so much stuff that you will definitely be doing 2-man counterweight for the body hauling. In reality, it’s often less physical to haul with 2 people being the counterweight than in those situations where it’s just you doing the haul yourself, especially if you are a somewhat light person. I guess the best thing I can say about hauling is it’s the one thing in rock climbing where heavier people get the advantage….
Nowadays when I am hauling, I am of a more Euro mindset, which is less is more. On the Salathe, I have seen teams with two massive bags, doing a 5 day ascent. I have also seen teams (usually from Europe), with one medium bag, doing a 2 day ascent. The amount of hauling is the difference between the amount of days. But it just depends on what you’re into. For the memories and the novelty factor, it may be worth bringing the boom box, case of beer and plastic flamingo. But there’s a LOT to be said for going fast and light, using ultra-light carabiners and ultra-light everything and bringing the smallest possible food stash, even when you are going “wall style”. It definitely makes the climbing feel nicer…. But, that’s a matter of personal preference! No matter what, you will have a great time.
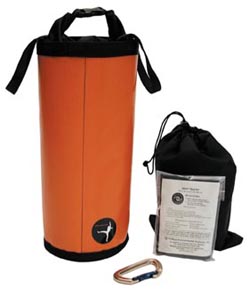
One final note, having lived through the era of making poop tubes from large (heavy) sections of PVC pipe, and then nowadays the more modern alternative, with the special Metolius mini-bag, I would say this is another opportunity to go light. I recommend buying either the Metolius waste case or a dedicated sealline drybag (like paddlers use), and using that to hold your Wag bags. Really, the only problem with the Metolius waste case is that it’s such a cute little haulbag, it seems a shame to use it for its intended purpose. I have one, but I like to use it for small gear and things, somewhat like a big wall purse. It was just too cute to despoil. So I guess that’s why I always end up using a drybag for THAT, which is also better in my opinion in that a drybag is completely waterproof and has the airtight rolltop. Anyway, either one is much lighter and easier to deal with than a huge PVC cylinder, especially on the way down. That being said, though minimalism is key, it is not possible to bring too many Wet Ones on a big wall ascent.
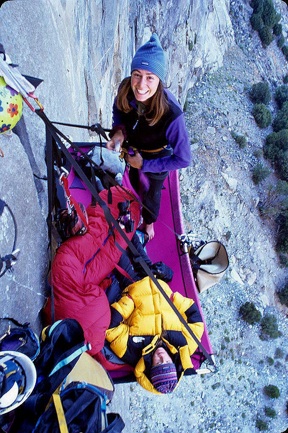
So generally speaking, the lighter you go, the easier your hauling is going to be. But at a certain point, if you are 3 strapping dudes on a big wall, you will probably not really care about the weight of a few extra cans of beer in the bag…. 🙂
Have fun!
xxSteph



Thanks as always Steph,
The cans of beer and a few vegan cookies make the experience on top monumental. It’s always good to slow down and look around when you have pushed for the top.
Just getting into aiding and wondering your pros and cons on different aiders you used. I flailed miserably in LCC seconding, jugging, an overhanging pitch (coffin roof), with poorly thought through runners the other night.
– Ross
Hi Ross, I like these standard Metolius aiders: http://www.backcountry.com/outdoorgear/Metolius-5-Step-Aider-1in/MET0265M.html
Being a light fanatic, I cut off all the parts I don’t need. If they are only going to be used for jugging, I cut off the top stuff and the top step, and the bottom step of the side you never use.
If I’m “full-on” aiding, I use 3 aiders. I keep them each on a non-locking biner, so it’s easy to pass them around. I also like to have a fifi hook.
For super light, alpine, I have a lighter version of these, with most of the steps cut off, and then I only use 2.
🙂 Steph
Hi Steph,
Just finished reading your book. It was truly inspirational! Thanks for writing it and for your contributions to the art and sport of climbing and to the climbing community…you’re an awesome woman.
Dave W.
Thanks Dave 🙂
xxSteph
Just *looking* at your pictures terrifies me, but I am suitably awed & impressed with your courage & knowledge base 🙂
Your story is really interesting and i enjoy it lot. I have never do hauling so i have no such idea on hauling. i just want to say that you have done awesome job. Keep it up…
Its great that you actually take the time to reply to these posts, props to you Steph..x
Tom
thanks Tom!